


In part 1,2 and 3 of this series we discussed the VPN role and its step by step installation, configuration, integration with the RADIUS server and the VPN client configuration with the main common problems from the client side
For more information, please check Part 1, 2 and 3 from this series.
https://itcallswin.blogspot.com.eg/ search :)
In this final post we will be adding to our solution the Multi factor Authentication using Azure MFA On-premise server. The MFA will add an extra security layer instead of depending only on the User name/Password. We will be using the model of something you know (Which is your password) + something you have (which is your device - Cell phone)
If you have Azure Active Directory Premium or Enterprise Mobility suite (EMS) then you already have the Azure MFA included. For more details on Azure MFA licensing and pricing, please check the below link
https://azure.microsoft.com/en-us/pricing/details/multi-factor-authentication/
Installing and Configuring Azure MFA On-Premise Server
- Log in to your Azure Portal - Active Directory - Multi factor Authentication Providers. If you have a provider you can directly manage it however if not as in our case you need to create an Authentication Provider

- Creating one is very easy Wizard as shown below however you have to make one important decision regarding the License model (Check above link for licensing)

- After Creating the provider you will be directed to the Azure Multi Factor Authentication page where you can find downloads and pick the one that suites your environment (In our case i am installing it on 64 Bit Windows server 2016).

- I will pick the 2012 R2 version since the 2016 wasn't available at that time and generate the activation codes. Please note this activation code will last for 10 minutes only to enter it in the MFA installation wizard later, if you took more than 10 minutes before you reached the Wizard part requiring it then you will get an error. Don't panic, all you need to do is come back here and generate a new code.

- Launch/Run the downloaded file, it will require couple of components and updates to be installed as shown below (Prerequisites).


- Go ahead and select the installation folder (You can safely have it in the default location)


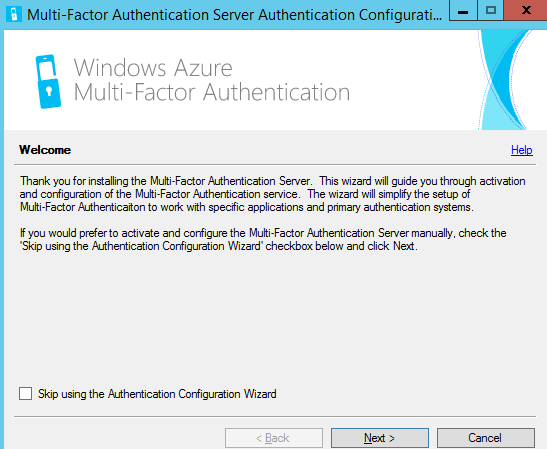
- After Installation, it will launch the configuration page - Click Next and add the activation code you copied from step 4


- The next option will be which service you need to apply MFA ? In our case we are applying it on the VPN service. This is is a very critical step, we will add here the VPN Server IP address and shared secret (You can use the one we used before with RADIUS). Now the VPN server Security was previously configured pointing to the RADIUS server, we need now to change it in VPN server to point to the MFA server (as if its the RADIUS server) and the MFA will connect on behalf of it to the RADIUS server. Check Part 2 of this series to add the MFA server instead of the RADIUS server directly and also check Part 2 on how to add a new RADIUS client (This time it will be the MFA server). So previously VPN server contact RADIUS directly, now Its VPN to MFA to RADIUS.


- Add the RADIUS server IP. Again remember the MFA is a broker now receiving requests from VPN (claiming to be RADIUS) and then contacting the real RADIUS.

- After finalizing the Wizard, open the Azure MFA Server application located on the Start Window and click on Users.

- Pick any user to enable the MFA. Add the Phone number and pick the MFA method (Phone call, Text, Mobile App....etc.) and then click on Enabled.

- Make sure that the user Account in Active Directory - Dial In Tab Network Access Permission = Allow Call Back Options = Set by Caller (RRAS)
- In the Azure MFA server Application - Click on Radius Authentication. On the Client you should have the IP address of the VPN server and on the Target you should have the RADIUS server IP.


By that you are ready to turn on to your client and connect your VPN and it won't sign you until you pick your phone and press the # key to complete authentication.
Through this 4 blog posts, i tried to detail each and every step with screen shots to make sure nothing is missed, Hopefully you enjoyed this series and you will try the VPN solution on your devices especially the portable ones (Tablets and phones).
See you on the next post.
Through this 4 blog posts, i tried to detail each and every step with screen shots to make sure nothing is missed, Hopefully you enjoyed this series and you will try the VPN solution on your devices especially the portable ones (Tablets and phones).
See you on the next post.
